
Want to know how baristas make such amazing milk coffees? Learn the basics of how to steam milk that’s silky and velvety smooth. Discover how to position your milk jug and steam wand for the best results.
Milk and coffee. A match made in heaven. If steamed well, milk adds a layer of velvety, natural sweetness to espresso. If frothed well, you get a rich, lucious foam layer to top your coffee off.
What You’ll Need
- An espresso machine with a steam wand. Most espresso machines should come with steam wands. To turn it on, you either pull a lever or twist a knob. Steam will gush out of it.
- A milk pitcher/jug. Typically, when you buy an espresso machine, milk pitchers are included in it. If not, you can buy really affordable (but good!) ones from your local department store or supermarket. The most common size is a 12 oz (350ml) stainless steel jug, which is perfect for single coffees. If you normally make multiple coffees at once, you could consider getting a 20 oz (600ml) pitcher too.
- Your favourite milk. Full cream milk, trim/skinny milk, soy, oat, almond or coconut milk – pick and choose to your heart’s content! Bear in mind that many dairy alternatives do not froth up as nicely as fresh cow’s milk. Coconut milk on its own, for example, is ridiculously difficult to froth. Factor this in when making your coffee.
Overview of Steam Wands
What is a Steam Wand?
A steam wand is a small, long metal tube that juts out the side of your espresso machine. It is connected to the water boiler. When you turn it on, dry steam rushes out at high pressure. This hot, high-pressure steam, along with the surrounding air, will be injected and mixed into your milk to create froth.
Caution! Some steam wands have a rubber grip on it. If yours does too, make sure you hold it and move it only by that rubber grip. Be careful not to touch the metal, as you could get burnt.
Types of Steam Wands
There are 2 main types of steam wands: the panarello wand (or pannarello – same thing, different spelling preference); or a regular, commercial-styled pin hole steam wand. What’s the difference between a panarello and a regular steam wand, you ask?
Panarello Wands
They come by many names: “auto-frothers”, “air injectors”, etc.. These types of wands are most commonly seen in smaller, lower-end espresso machines; or super-automatic coffee machines that make coffee with one push of a button. Panarello wands were designed to make frothing milk easy for beginners. As expected, they are extremely easy to use. They do all the work for you.
They are usually a thick plastic/metal sheath with tiny air holes along the top rim, and one large hole at the bottom of the nozzle. Air is automatically sucked in from the top air holes and it is infused into the milk, creating a thick, heavily frothed texture. Great for cappuccinos.
Some panarellos are detachable. Think of them as an adaptor, or a sleeve you can fit over a regular steam wand, if you want the easier method of steaming milk. Whereas for some models, you do not have an option to remove it – the steam wand is a die-cast panarello, with the air holes built into the wand body directly.
Pin-hole Wands
For those who want to learn how to better texture silky smooth milk for the best taste and latte art, pin-hole wands are your best friend. Made of metal, these wands are fully enclosed. They have tiny holes only at the bottom tip of the nozzle, that shoots thin jets of hot, high-pressured steam out. You position these holes just below the surface of the milk. When the steam is turned on, you adjust its position so that a tiny bit of surrounding air will be sucked in. The steam will spin the milk around rapidly and force the air to mix with the milk. This creates a smooth tasting drink.
Ultimately, you control how much air is drawn in (and subsequently, how much froth you create) by adjusting the position of the pitcher.
This method is what professional baristas use to steam milk. It takes time to learn, but is incredibly fun. Once you master this technique, you are free to froth your milk as thick or thin as you like. You are in charge, and you have full control.
How Do I Know Which Steam Wand I Have?
If your steam wand is: fat, has a plastic covering, has a huge hole at the bottom and one or several holes along the body, it is a panarello.
If your steam wand is skinny, made of metal, and the only holes are at the very tip of the nozzle, it’s a pin-hole type wand.
Steaming vs Frothing Milk
These two words seem almost interchangeable. But there are very important differences between “steaming” and “frothing” milk. Before we get into the step-by-step guide, you need to understand this.
Steaming
Steaming milk is basically heating the milk with hot steam, and injecting a teeny bit of surrounding air. The milk spins around rapidly, which mixes the air and milk uniformly into a smooth texture with tiny bubbles. This is what we baristas call “microfoam”. It blends harmoniously with espresso, and the first sip will leave you with a rich, silky mouthfeel. You’ll find this type of milk in lattes and flat whites.
That there is a zoomed in image of the surface of a cup of flat white coffee. I’ve steamed the milk in such a way that you can see the tiny air bubbles that make up the microfoam. Usually, the bubbles will be even smaller, to the point where you can’t see any visible bubbles with your naked eye. The air bubbles would have been spun so smoothly it blends entirely into the milk.
Well-steamed milk will present itself with a shiny, glossy, almost reflective surface. That is the hallmark of a well-trained barista, and it’s the staple across milk coffees in specialty coffee cafes. This is the bulk of what I’ll teach you below.
Frothing
Frothing is when you heat the milk and inject a large amount of air. This thickens the milk and you get a heavy, bubbly texture. We call this “froth”. This is the type of milk you get for traditional cappuccinos.
There are quite a bit more technicalities than this, but for now, knowing this will suffice.
Steaming creates smooth, silky milk; frothing creates thick, bubbly milk.
How to Steam Milk: The Step by Step Process
How to Steam Milk Using a Panarello Wand
- Fill your milk pitcher until about halfway full. Position the steam wand so that the bottom half is submerged into the milk. Turn it on, and hold the pitcher steady. If it fits, you can even just let the pitcher sit on the drip tray without moving it.
- The air holes along the top rim will automatically suck in air. This air travels down the steam wand, out from the bottom hole, and into your milk. Remember when you were a kid and you blew down your straw to create bubbles in your drink? The same thing is essentially happening here. As air is blown in at high pressure and temperature, it mixes with the milk, which increases the total volume of liquid in the pitcher.
- As the level of milk rises, gently tap the side of the pitcher with your palm to feel the temperature. Just as it gets too hot to touch, turn your steam wand off. Remove the milk pitcher and wipe down your wand. Give the pitcher a few hard taps on the table to pop any large bubbles. Pour the milk into your espresso and enjoy.
It is really simple to use a panarello wand. For beginners who are just getting started, or who want a quick and easy milk coffee in the morning, it works wonders. However, bear in mind that with Pinarello, you will be getting mostly frothed milk as opposed to steamed milk. It won’t be velvety or smooth. This is because the panarello does all the work for you – it sucks in extra air to froth up the milk. You have little control over the amount of air going in, and more importantly, how it goes in.
How to Steam Milk Using A Pin-hole Wand
Step 1: Fill the Milk Pitcher
First of all, ensure the jug size you are using matches the cup size of your intended coffee:
- If you’re making one small cup of coffee, say 6 oz to 8 oz, use a 12 oz milk pitcher.
- If you’re steaming milk for a large cup (e.g. 12 oz) or two smaller cups, use a 20 oz milk pitcher.
Fill your pitcher with cold, fresh milk. Fill it to about halfway, or just below the spout of the jug. It doesn’t matter what size or shape your pitcher is. You will only ever want to fill the pitcher half full. This is because later, the milk volume will increase (and sometimes almost double) during steaming, so you want to make sure you have enough space for the milk to expand.
Step 2: Purge The Steam Wand
Purge the steam wand. To do this, turn it on and let it run for a few seconds, until you see only dry steam come out of it. You don’t want any water droplets coming out of the wand.
Step 3: Steam Wand Position
Hold the milk jug by the handle with one hand. Insert the steam wand into the milk. You can use the spout of your milk pitcher to guide the steam wand into the milk to position it. Pay attention – this part is a little tricky to get right.
- Depth: Immerse the steam wand until the tip of the steam wand sits just below the surface of the milk. The line of the steam wand tip should be visible. Be careful not insert it too deep. You want it just ever so slightly under the surface, not sunk like the Titanic.
- Position: Angle your milk jug sideways, so that the steam wand points off-centre to one side. The steam wand should almost touch the wall of the pitcher. Do not place it dead center.
Step 4: Steam On!
Turn the steam wand on. Because the nozzle of the wand is pointing off-center, the steam pressure will force the milk to spin around in a whirlpool. This is exactly what you want to see happen.
If you don’t see the milk spinning in a circle around the jug, try moving the jug a little. It takes some experimenting to get this right.
But, do make sure you physically position the milk pitcher correctly before you turn the steam on (refer to Step 3’s diagram). You don’t want to turn the steam knob on, and then wrangle the pitcher like crazy. Your milk quality will suffer.
Step 5: Controlling the Amount of Froth

Lower the pitcher to create froth. Don’t lower it too far or the steam wand will pop out of the milk and spray everywhere. Move the pitcher down just enough, until the tip of the steam wand breaches the milk surface ever so slightly. This will suck in air and create a thicker, creamier texture in the milk.
- When air is sucked in, a hissing sound will be produced. You want to hear something that sounds like paper tearing or static (“tss-tss-tss”). If you hear this, you’ll know you’re doing it right. This is called “stretching” the milk.
Raise the pitcher to stop creating froth. Once you’re happy with the amount of froth, raise the pitcher until the steam wand tip is fully submerged in the milk. This will stop any extra air from being sucked in.
- When air is no longer being sucked in, the milk will go silent and the hissing will stop. At most, you’ll hear a muted whirring as the milk spins – this is what you should hear. If you’re still hearing that hissing, it means air is still being injected, so raise the pitcher slightly more to submerge the steam wand further.
Lower and raise the pitcher as you like to add as much froth as you want. This is where you truly get to control how foamy you’d like your coffee – flat and silky for a flat white; or thick and luscious for a cappuccino.
Make sure the milk is still spinning in a whirlpool – this is how air and milk are mixed to create that smooth, tasty microfoam.
When doing all this, try to keep the steam wand fixed in position. Resist the urge to readjust the steam wand. Control the steam tip’s position by only moving the pitcher.
Step 6: Feel the Temperature
As you’re injecting steam and air into the milk, tap your free hand against the side of the pitcher. Feel the temperature heat up. Just as it gets too hot to touch, turn off the steam wand. Alternatively, you could use a milk thermometer. Professionally, in a cafe setting, we baristas aim for 60°C to 65°C (140°F to 150°F). This is the sweet spot where milk tastes the best – rich and velvety and sweet. But really, feel free to steam it to your liking. It’s for you to enjoy, after all!
Just a little warning, if you steam milk to above 75°C, the natural sweetness of the milk will be burnt away. You’ll lose the silky texture as the proteins break apart. (This is why baristas don’t really like it when customers order extra hot coffees – they know that the taste sucks.)
Be careful! Especially if it’s your first time steaming milk, make sure you tap the side of the pitcher to check the temperature. Take your palm off regularly. Do not stick your hand on the pitcher the whole time, or you might get burnt as the milk heats up. And trust me, it heats up very rapidly in those final few seconds.
Step 7: Wipe and Purge the Steam Wand
Remove the milk pitcher from the steam wand. Set it aside for now, and clean your steam wand. Wipe it down with a damp cloth and purge it for a couple of seconds.
Make it a habit to immediately wipe and purge your steam wand after using it. Purging the steam wand stops milk from clogging up the pin-holes, and wiping it straight away prevents hot milk residue getting stuck on it.
Step 8: Tap and Swirl
You may have seen baristas do this before. They bang their milk pitchers on the counter top a couple of times right before pouring. Should you do this? Heck, yeah!
- Tap the milk pitcher down against the counter top once or twice. Tapping it will pop any unwanted bubbles that have formed in your milk.
- Next, give the milk in the pitcher a few good swirls. Swirling it will further mix the milk and the foam, giving it a glossy smooth texture.
Be careful not to whack it down too hard, or else the milk might spill out.
Step 9: Pour and Serve
You are ready to pour your steamed milk into your espresso! First, give the espresso a swirl, so that the crema mixes with the body. This makes it easier for milk to mix in thoroughly. Then, pour away.
Barista Tip: After steaming your milk, you’ll want to pour it as quickly as possible. If you let it sit unattended for a few minutes, the milk and foam will separate. You won’t get that richness and texture if the milk spits – instead you’ll see it gets bubbly and may even clump as a separate layer atop the espresso shot.
Enjoy your delicious milk coffee!
How to Steam Milk – The Troubleshoot

This is a skill that takes time to master. Don’t be disheartened if you don’t get it right on the first try – I haven’t met a single barista that successfully steamed perfect, velvety smooth milk on day one. Here are two common issues faced when learning how to steam milk, alongside some steps you can take to rectify it.
The Milk Screeches While Steaming
- This usually means you haven’t injected enough air (or none at all). Lower your pitcher until you hear that “tss-tss-tss” sound of paper tearing.
- You might be steaming your milk to far too high a temperature. Aim for no more than 65°C (150°C) and shut off the steam wand immediately.
The Milk Overflows and Spills Out the Pitcher
- You might have had too much milk in the pitcher when you started steaming. Fill it slightly less than half full.
- Stretch the milk less, i.e. inject less air. Raise the pitcher a little sooner – this will submerge the steam wand and stop any more air from being drawn in.
Now, here are two problems you may observe after you have finished steaming the milk. You might notice these issues crop up when you’re trying to pour it.
The Milk Appears Too Watery
- Lower the milk pitcher longer so more air is injected and mixed in. No matter how thin you want your foam level to be, you still need to inject a minimal amount of air so the milk can hold together nicely.
- Try a different type of milk. Trim or skinny milk is much, much harder to froth up due to its low fat content. Try it with fresh/whole milk to get the hang of it.
The Milk Texture is Bubbly and Clumped Up
- You might have frothed the milk too much. Raise the pitcher a little sooner next time – this will submerge the steam wand and stop any more air from being drawn in.
- Again, check the type of milk. Soy milk has a tendency to clump, especially if you’re using coffee beans with a lighter roast.
- Check that the milk is indeed spinning in a whirlpool. If the milk is not spinning as it should, the air will not mix into it. The result is a thick, messy layer of froth that just clumps up and sits on top of the espresso.
Practice makes progress. Take your time, and remember to enjoy the process – have fun! After all, that’s what coffee is about, isn’t it? If you stumble across difficulties or confusion, drop a comment below.
How to Froth Milk Without A Steam Wand

Option #1 – French Press
Measure up the amount of milk you need, then warm your milk up in the microwave. Pour it into your French Press. You want it no more than halfway full. Pop the lid on, then pump away! Keep pumping up and down until the milk roughly doubles in volume.
Experiment with a range of large, deep pumps versus small, light pumps. This can give you a fair degree of control over how frothy or silky the milk will turn out to be. Using the French Press for frothing milk is a super simple technique, but indeed a reliable, tried and true one.
If you don’t have an espresso machine, but still want to pour latte art, using a French Press to froth your milk is the second best method after a steam wand. I’ll have a whole separate article where I show you all the tips and tricks for French Press and milk. Stay tuned for that – once it’s written and published, I’ll update a link here.
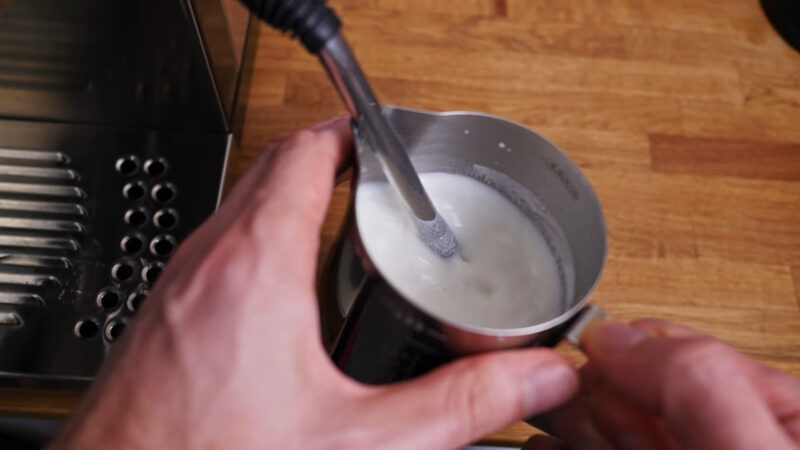
Option #2 – Electric Frothing Wands
These battery-operated, handheld wands are affordable, portable and saves you a lot of physical labour. They function similarly to an electric whisk. Once you’ve warmed up your milk in the microwave or saucepan, simply lower the frothing wand into your milk, switch it on, and the metal rod will spin and vibrate, beating up air and milk into one frothy, yummy drink.
For more froth, raise the tip of the wand so that it almost breaches the surface of the milk. This will whip more air into the milk. If you prefer a thinner consistency, lower the wand into the pitcher.
Option #3 – Automatic Frother
Pour the milk, close it, plug it in and press start. It’s that easy with an automatic frother. Many models even have different button settings for more froth or less froth. As an added advantage, these machines will heat up your milk for you. You won’t have to go through the extra step at the beginning to heat your milk separately.
Out of all the options, using an automatic milk frother is also the most convenient method for steaming and frothing milk. You can start it, walk away to prepare your morning breakfast, then come back to your heated, frothed milk, ready for pouring into your espresso.
Option #4 – The good ol’ shake
No technique needed here! You fill a mason jar or container up to half full with milk. Make sure the lid is sealed on really tight – then start shaking it up and down, left to right, side to side, and do the cha-cha. Granted, you won’t be getting particularly smooth milk, but hey, for a quick fix when you’re craving that frothy milk, it works!
Conclusion
While using a steam wand is indeed the preferred method of steaming and frothing milk, there are an abundance of ways to get that mouth-watering, deliciously creamy milk. Don’t let the price or equipment be a barrier to pursuing better coffee. The most important thing here is the desire to learn.
Steaming and frothing milk is an incredible skillset to have in a home barista’s arsenal. Sure, it does take time and perseverance to learn, but always remember that practice makes progress. And this is one skill that will pay off well, by adding a hearty, wondrous layer of depth and flavour to coffee. So what are you waiting for? Your homework is to get out there and make that latte!